Introduction
I recently purchased my first 3d printer for Christmas, and soon found out I’m probably one of the last among my friends to own one. It has proven to be immediately useful, especially with all of the pre-made objects on websites like printables.com . I soon found myself needing a few custom objects where existing prints didn’t already exist.
Unfortunately, I have zero 3d modeling experience. I do however have expertise in software and AI Agent engineering. I decided to set out on a quest to build a multi-agent object creation team to help build 3d models for objects I needed to print. Within hours, I had some sharp looking models ready to print. Below are a few snippets–these are intended to be used as under-desk mounts for Schiit audio devices.
AI Created Results (Under Desk C-Mounts)
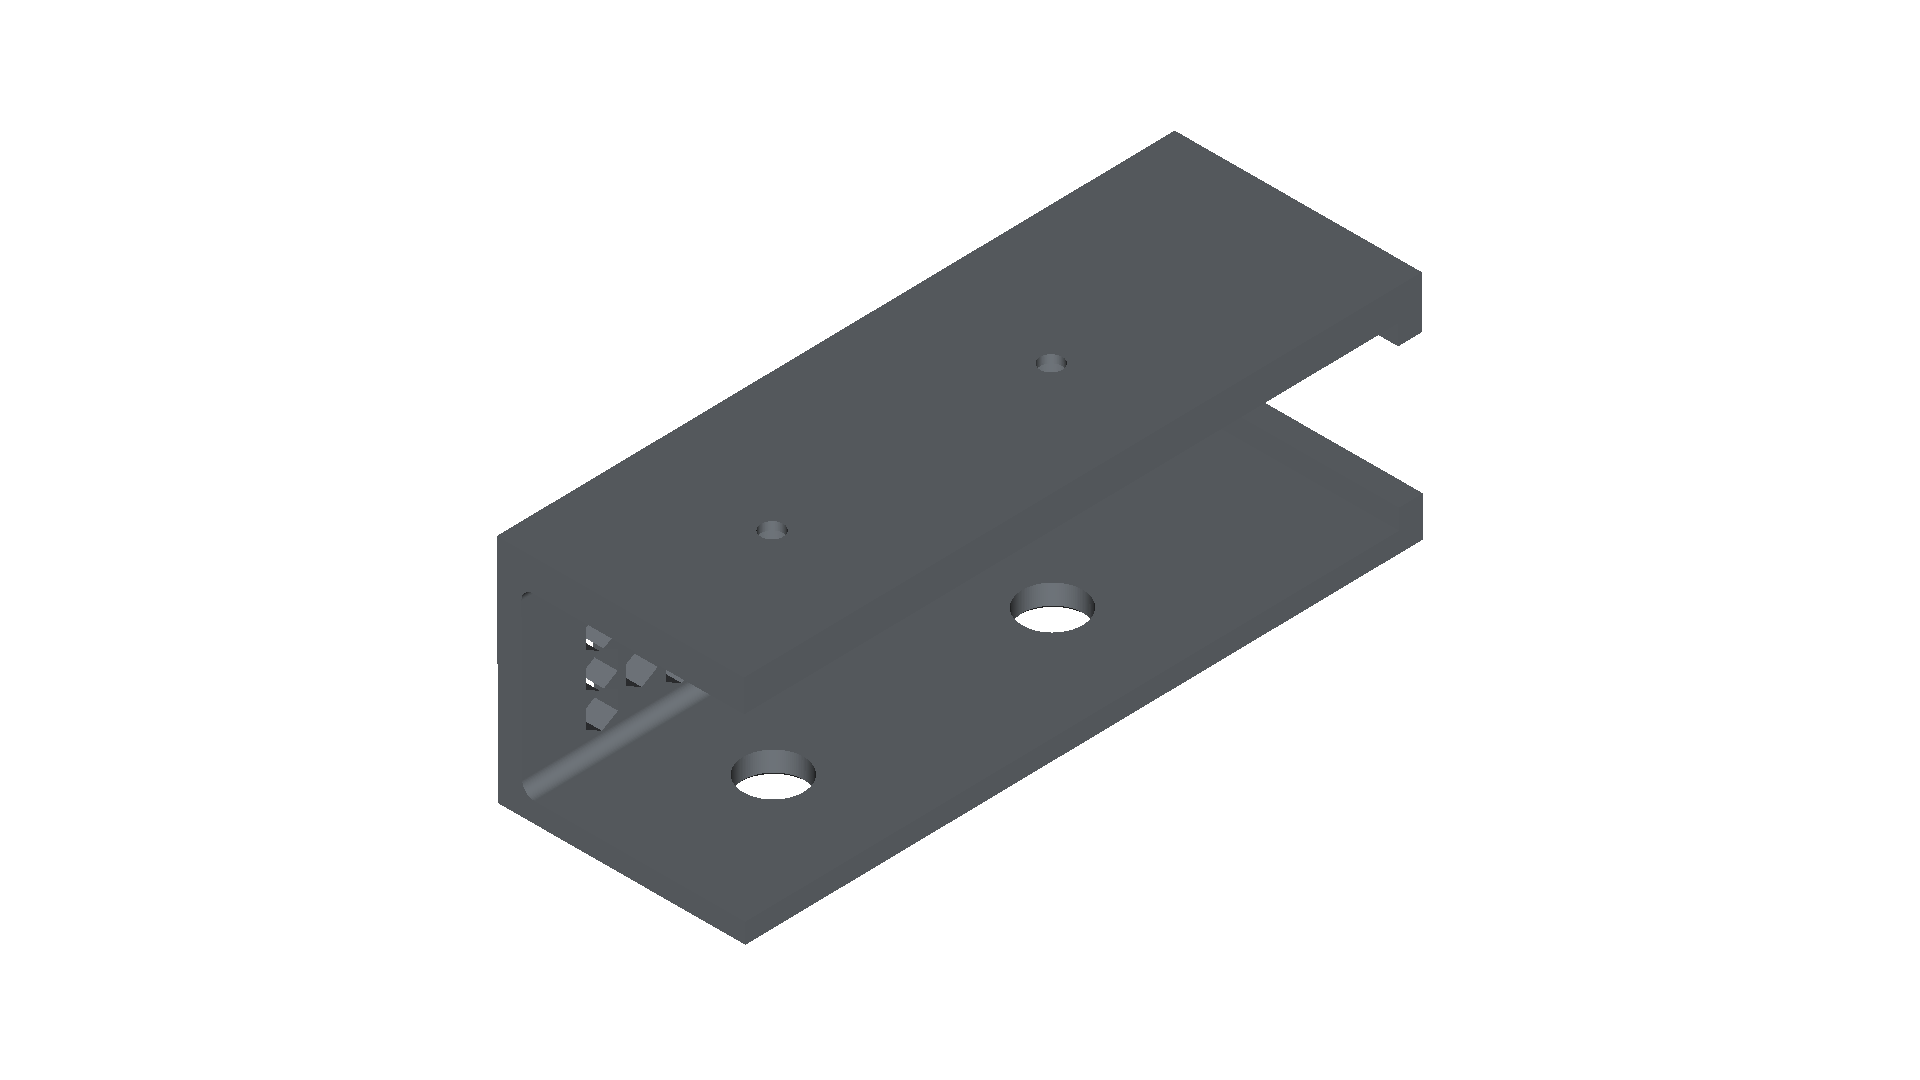
From the above image, you can see there are large holes to make installing the screw in the upper mounts easier as a tool can now pass through.
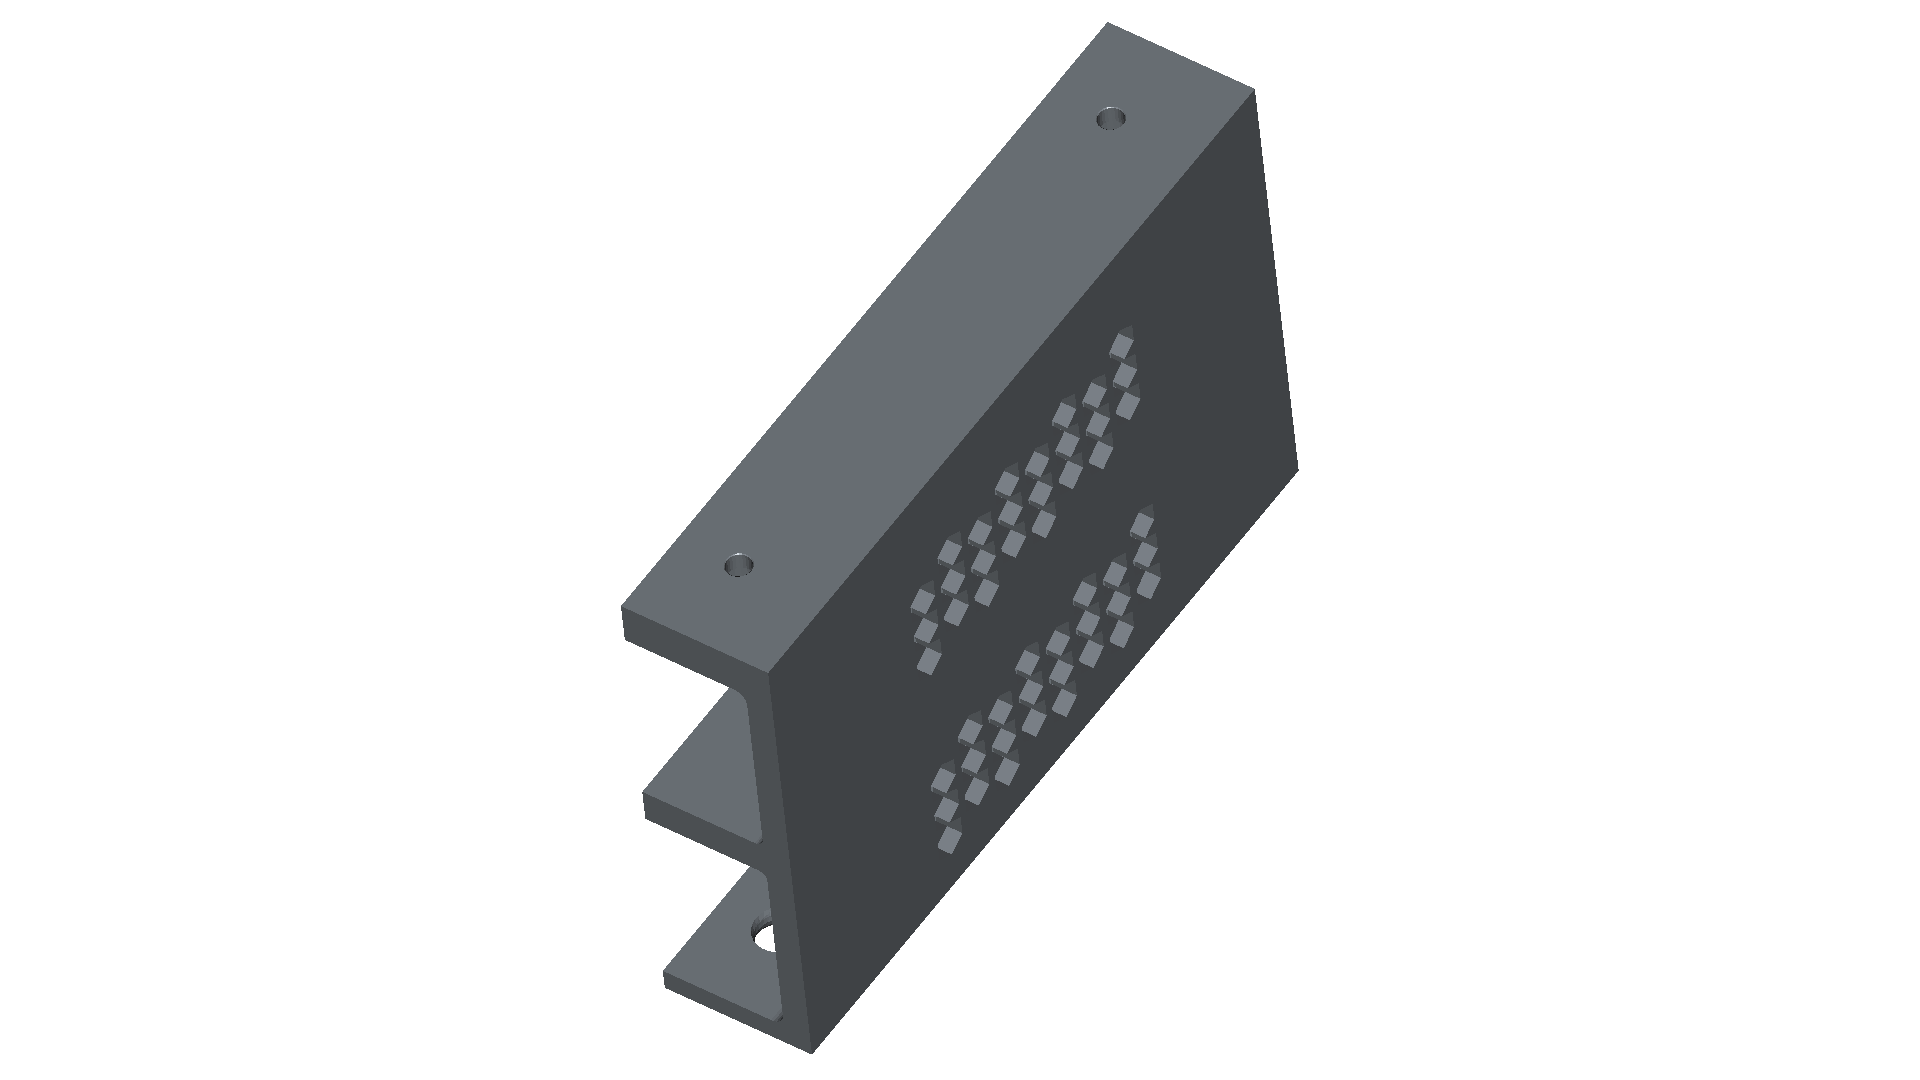
Hexagonal ventilation can be seen above.
Trial and Error
What kicked off this project, was seeing that freecad-mcp existed. I installed and configured in FreeCAD using the directions. unfortunately, the MCP responses from the tooling are so large that you can only complete about 3 or 4 turns before the context files. My first approach was to deploy a Haiku subagent “CAD Object Viewer” which was equipped with an ephemeral context and read only CAD MCP tooling. The orchestrator agent was tasked with using the subagent to view objects and receive descriptions to preserve the main agent context….Unfortunately, this path forward only unlocked a handful more total turns in the conversation. Context still degraded and the results yielded were poor.
FreeCAD Macros / 3d-model-as-code.
I learned that FreeCAD supported Python Macros which can include python specs that provide macro instructions to create objects!!! This is tremendously helpful for a few reasons.
- Python code informing object construction preserves context
- Re-usable components
- Dynamically generated components (scaling vents/dimensions)
- version control for 3d models!
Now we can commit our progress and rollback to known good models, I was starting to feel much more comfortable in the realm of CAD/3d modeling. After gaining comfort using a python spec to generate objects in FreeCAD (Macro -> Macros -> Specify Script Location) I decided to build out my domain specialist team.
Usable Workflow
In the CLAUDE.md for the orchestrator, I used a pattern I’ve employed on other projects and specified a directory llm_memory for the agents to hand off materials to each other. The main markdown provides several workflow examples, capturing the general flow of
- Mechanical Designer decomposes task, writes detailed spec
- CAD Spec Implementer writes the code
- Mechanical Designer then
- Executes via MCP (to render object)
- Get View via MCP (to view object)
- Provide feedback or approve
Below is a cluttered low diagram capturing my current process.
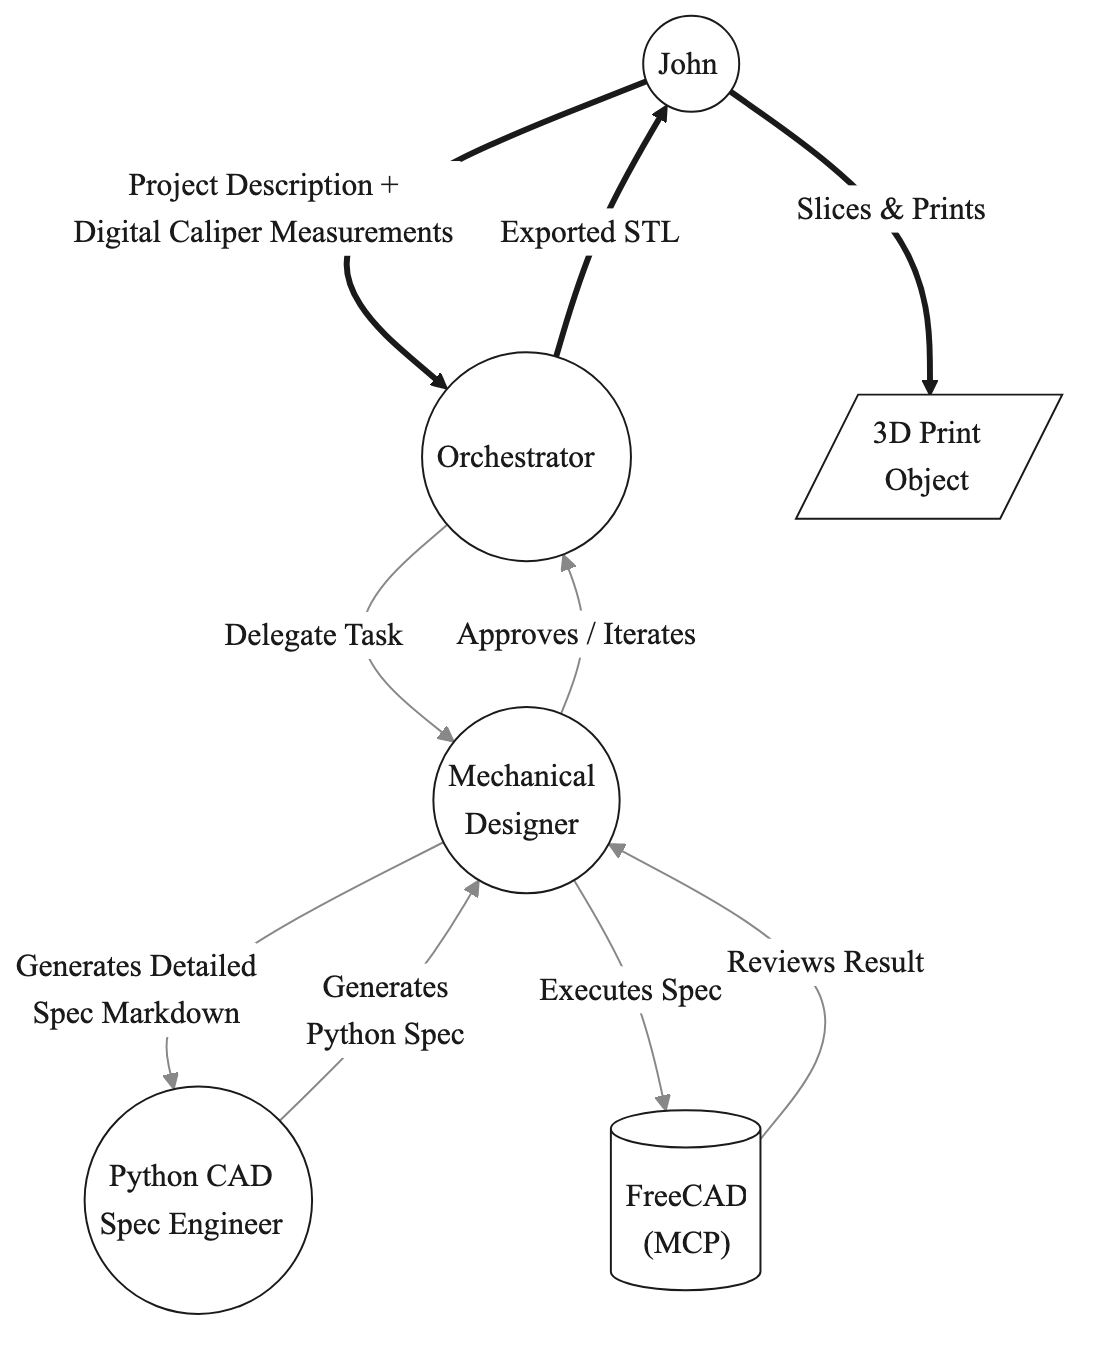
The end result, is that by avoiding MCP to build the objects I can preserve context and have much long working sessions. Further, when context is preserved for each domain expert they excel at their specific tasks (The Mechanical Engineer’s context isn’t cluttered with python scripts or huge paylods descripting CAD object meshes.)
Conclusion & The Future
The workflow I’ve outlined above is functional, but far from perfect. It’s what I cobbled together over the course of a day of tinkering and I wanted to write a quick post capturing it. I’ve already printed a handful of mounts and am continuing to iterate/test materials.
I think that in the future I may explore the MCP integration a bit more and try to identify context preservation opportunities–like compressing the base64 encoded object views prior to sending to the LLM, or potentially using tiny models to describe images instead.
I’ll definitely be starting a public GitHub repo with some of the python specs for the objects I’ve been having AI create.